
Introduction
Deploying Visual Studio Community 2022 through Microsoft Intune can simplify software distribution across an organization, ensuring consistency and ease of access via the Company Portal. If you’re looking for a way to automate the installation while allowing employees and developers to install it seamlessly, this guide covers everything you need.
In this article, I’ll walk you through the exact steps I followed to successfully deploy Visual Studio Community 2022 using Intune, making it available to my team in the Company Portal.
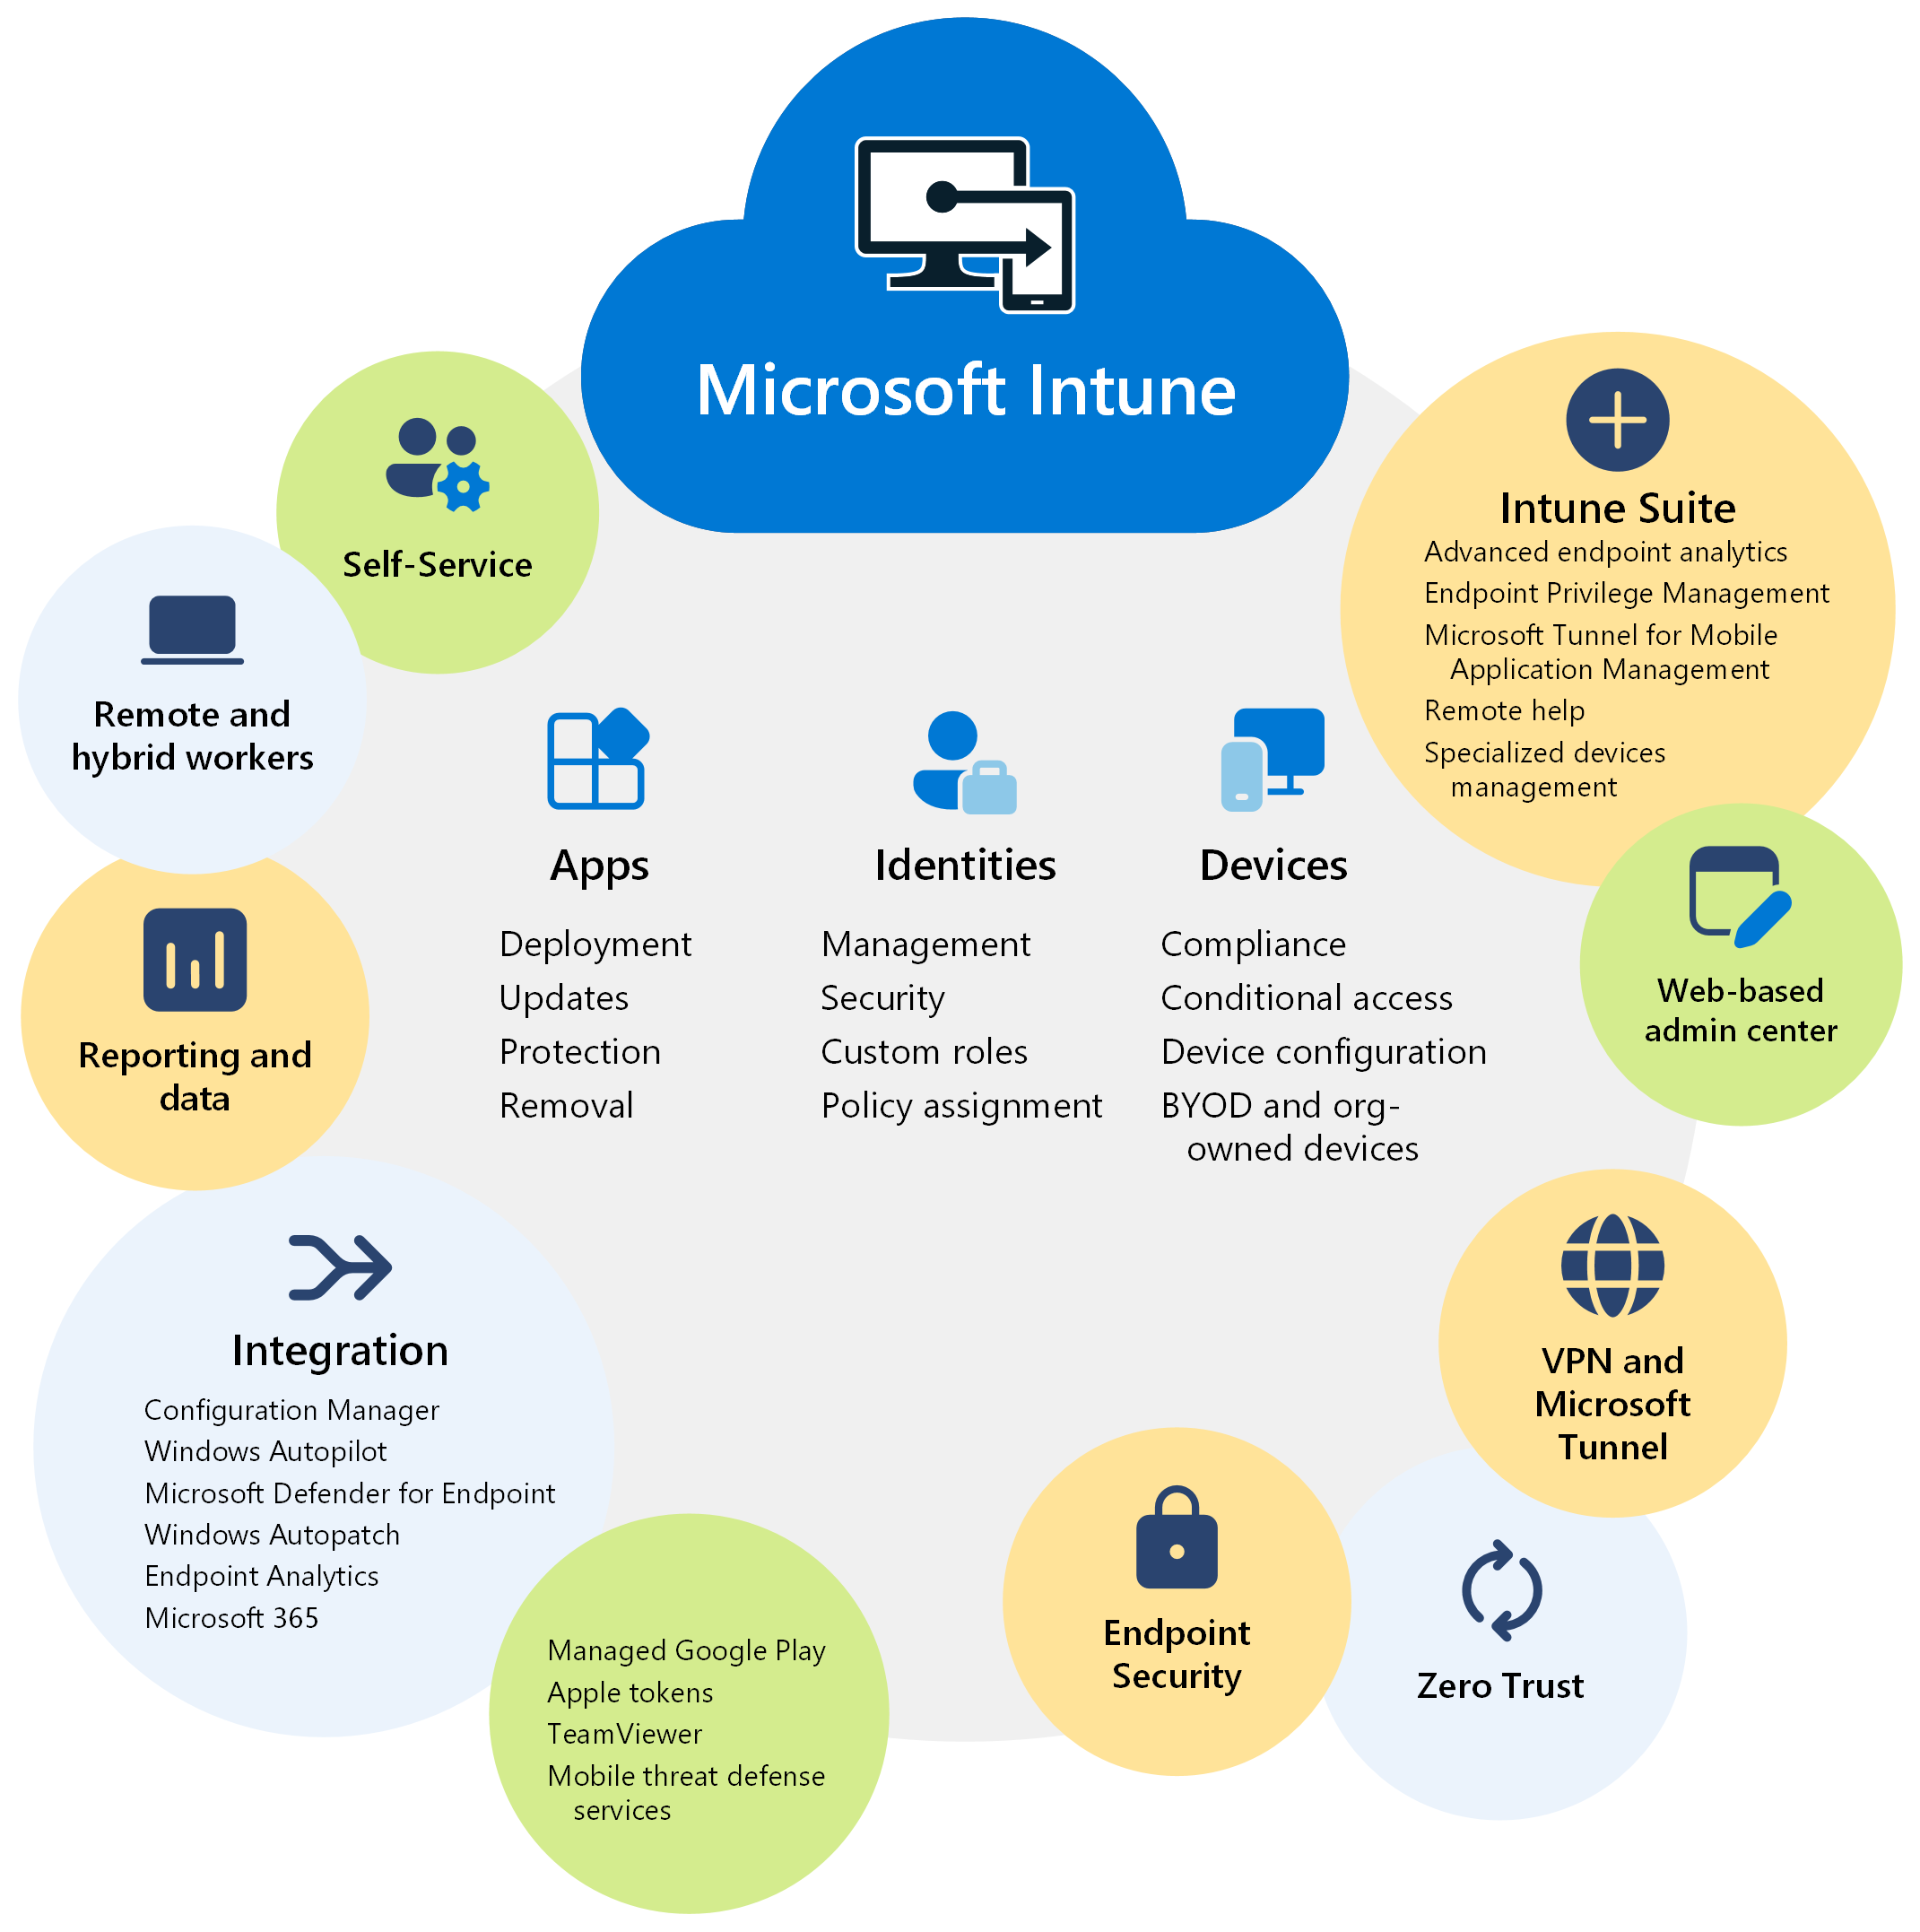
Why Use Intune for Software Deployment?
Microsoft Intune is a cloud-based endpoint management solution that allows IT admins to deploy, manage, and secure applications across an organization. Instead of asking employees to manually download and install Visual Studio, Intune automates the process while ensuring compliance.
- Automates deployment
- Standardizes installation across all devices
- Reduces manual effort
- Makes VS Community available via the Company Portal
Step 1: Download the Visual Studio Installer
The first step is to download the VS Community installer, which we’ll package for deployment.
- Open PowerShell and run the following command:
PowerShell1
Invoke-WebRequest -Uri "https://aka.ms/vs/17/release/vs_Community.exe" -OutFile "vs_Community.exe"- This downloads vs_Community.exe, the official installer for Visual Studio 2022 Community Edition.
Step 2: Prepare the Installer for Intune
Intune requires Win32 apps to be converted into the .intunewin format using Microsoft’s Win32 Content Prep Tool.
- Download the Microsoft Win32 Content Prep Tool.
- Run the following command to convert the installer:
CMD
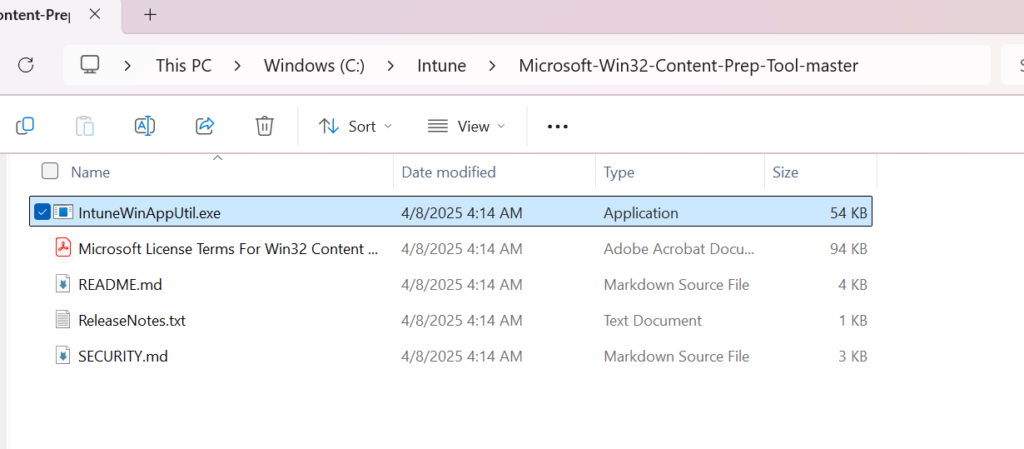
IntuneWinAppUtil.exe -c "C:\Path\To\Installer" -s "vs_Community.exe" -o "C:\Path\To\Output"This creates a .intunewin file that we’ll upload to Intune.
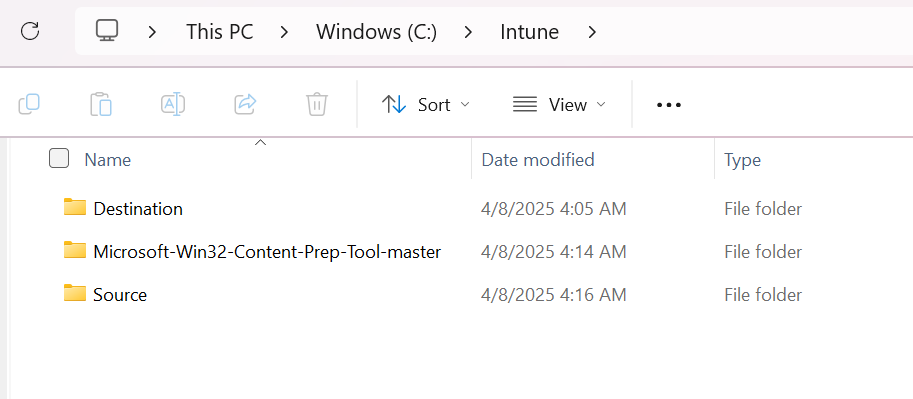
Below are my actual screenshots , that’s how I created :
I added a folder in my C drive named as Intune, and inside that created further three more folders
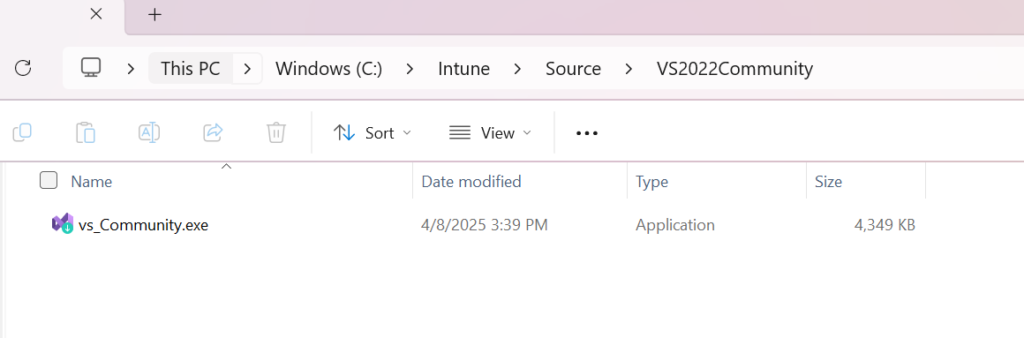
- Source Folder (Path to Installer)
Inside the Source Folder , I created VS2022Community Folder just keep things aligned when I need to create another intune package I can use the same source folder keeping differne sub folder in this case its VS2022Community and inside this I saved vs_Community.exe which we downloade earlier by the powershell command
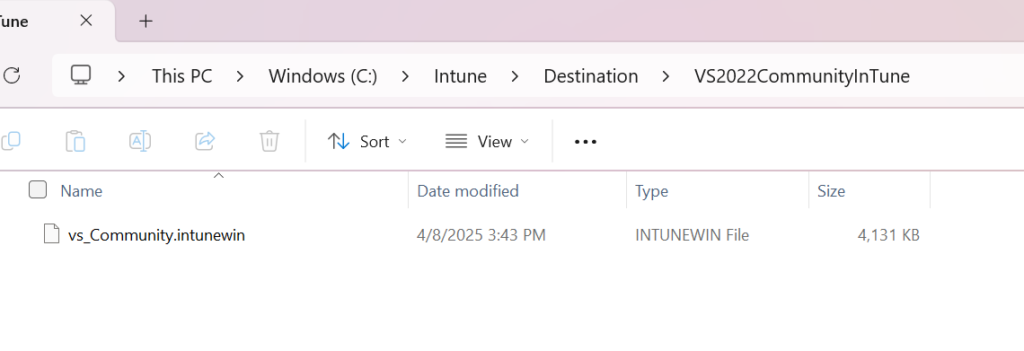
2. Destination Folder – its the folder where the intune package will be created. Same way like in source folder, I created a sub folder in destination folder as well so that later I can utilize the same destination folder to create other packages. That’s why in the screenshot you see VS2022CommunityInTune sub folder and inside that the created package resides.
3. Microsoft-Win32-Content-PreP-Tool-Master Folder
Step 3: Create the Intune Package
Now, let’s upload the installer to Microsoft Endpoint Manager:
- Go to Microsoft Endpoint Manager Admin Center
- Navigate to Apps → Windows → Add
- Select Win32 app and upload the
.intunewinfile
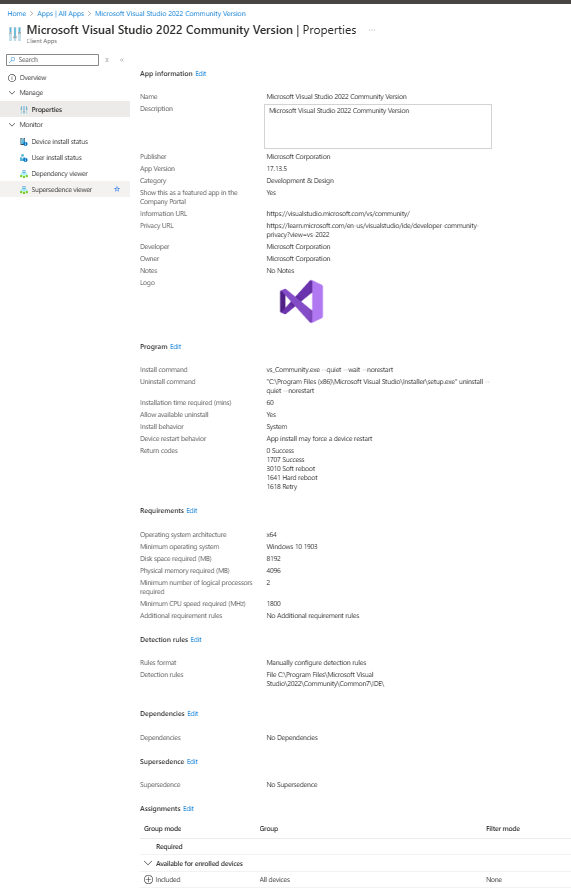
Install Command:
CMD
vs_Community.exe --quiet --wait --norestartUninstall Command
CMD
"C:\Program Files (x86)\Microsoft Visual Studio\Installer\setup.exe" uninstall --quiet --norestartThis ensures silent installation with no user interruption.
Step 4: Configure Detection Rules
Detection rules tell Intune when the application has been successfully installed.
- File-based detection → Check if the following file exists:
C:\Program Files\Microsoft Visual Studio\2022\Community\Common7\IDE\devenv.exe - Registry-based detection → Use this registry key:
HKEY_LOCAL_MACHINE\SOFTWARE\Microsoft\VisualStudio\Setup\VS\Community
Setting these ensures Intune accurately detects when Visual Studio is installed.
Step 5: Assign the App to Users
To make Visual Studio available in the Company Portal:
- Assign the app to All Devices or a specific user group
- Choose Required (mandatory installation) or Available (optional installation)
- Deploy and monitor installation progress in Intune logs:
C:\ProgramData\Microsoft\IntuneManagementExtension\Logs
Pasting my settings here , for your ease
Step 6: Testing and Validation
Before rolling out the deployment to everyone, test it on a few devices:
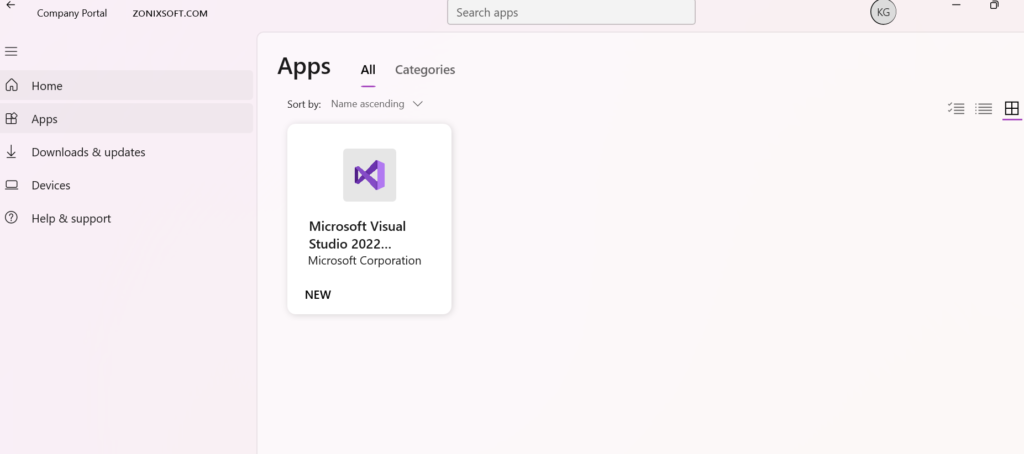
- Ensure the Company Portal displays the VS Community app
- Click Install and verify the silent installation completes
- Confirm the presence of
devenv.exeto validate installation
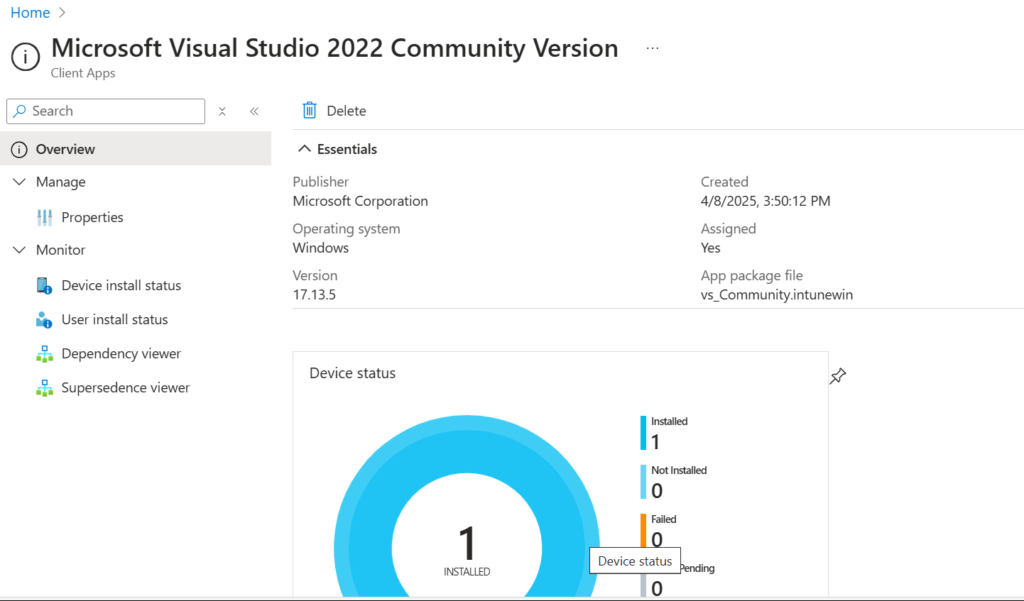
Following these steps, I successfully deployed Visual Studio 2022 Community Edition via Intune, making it available in the Company Portal for my team. Now, anyone in the organization can install VS effortlessly without needing admin privileges.
This process automates software deployment, saving time for IT teams and ensuring developers have easy access to Visual Studio.
Company Portal Screen:
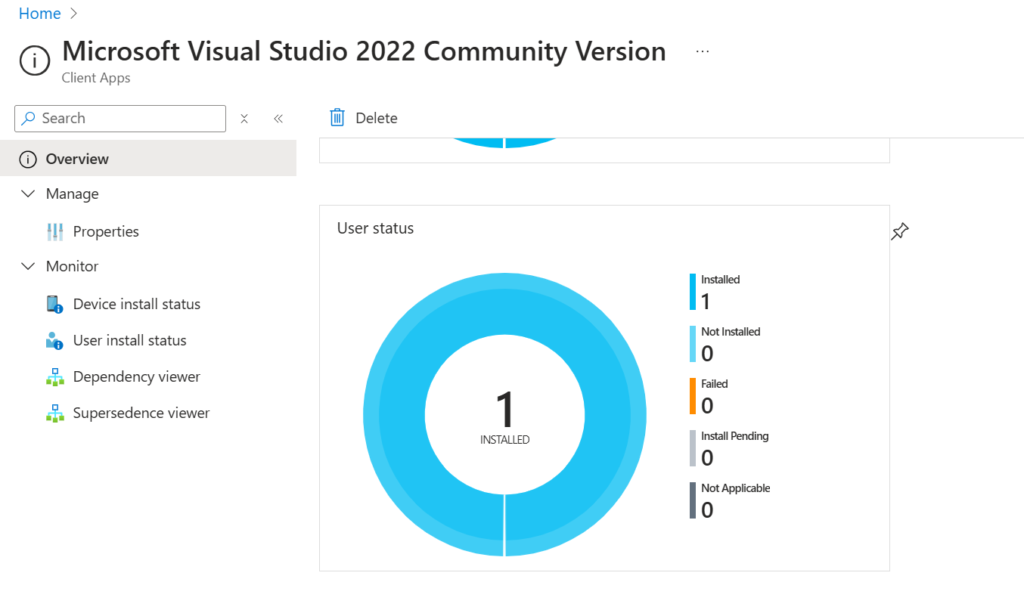
Successfully Installed (Device and User Status)
If you’re planning to deploy VS Community via Intune, follow this guide and let me know your experience!