
Introduction:
In the digital age, we generate massive amounts of data every day. Sentiment analysis helps us understand the emotions expressed in text data, such as whether it’s positive, negative, or neutral. ML.NET is a machine learning framework that enables developers to perform sentiment analysis using C# or any .NET programming language. In this blog post, we’ll explore the basics of sentiment analysis in ML.NET and how it can help unlock valuable insights from text data.
Sentiment Analysis:
Sentiment analysis is all about figuring out the emotional tone of a piece of text. It helps us determine whether the sentiment is positive (happy, satisfied), negative (sad, angry), or neutral (neutral, indifferent). By analyzing text from social media posts, customer reviews, and other sources, sentiment analysis allows businesses to make informed decisions, improve customer experiences, and spot emerging trends.
ML.NET:
ML.NET is a machine learning framework developed by Microsoft. It lets developers build custom machine learning models using C# or any .NET language. ML.NET simplifies the integration of machine learning into applications and offers various algorithms and pre-trained models. It’s designed to make machine learning accessible to developers with different levels of expertise.
Performing Sentiment Analysis with ML.NET:
1.Select the C# Console App project template.
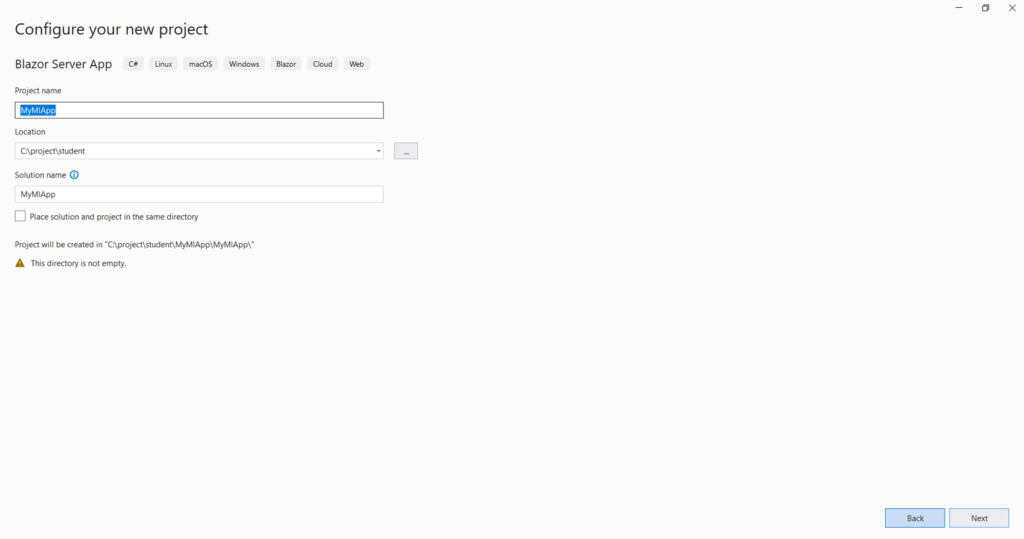
2.Change the project name to myMLApp.
3.Make sure Place solution and project in the same directory is unchecked
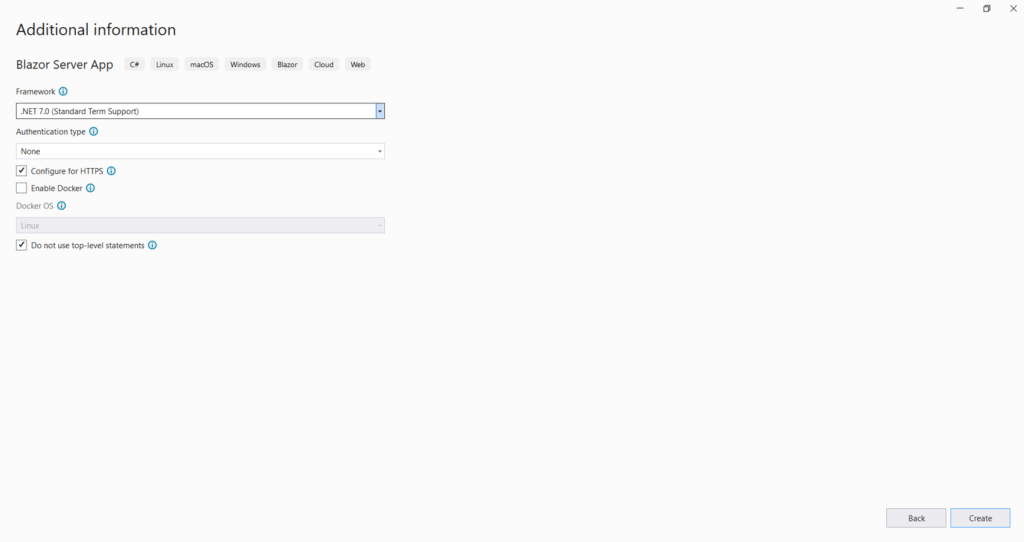
4.Select .NET 7.0 (Standard Term support) as the Framework.
5.Right-click on the myMLApp project in Solution Explorer and select Add > Machine Learning Model.
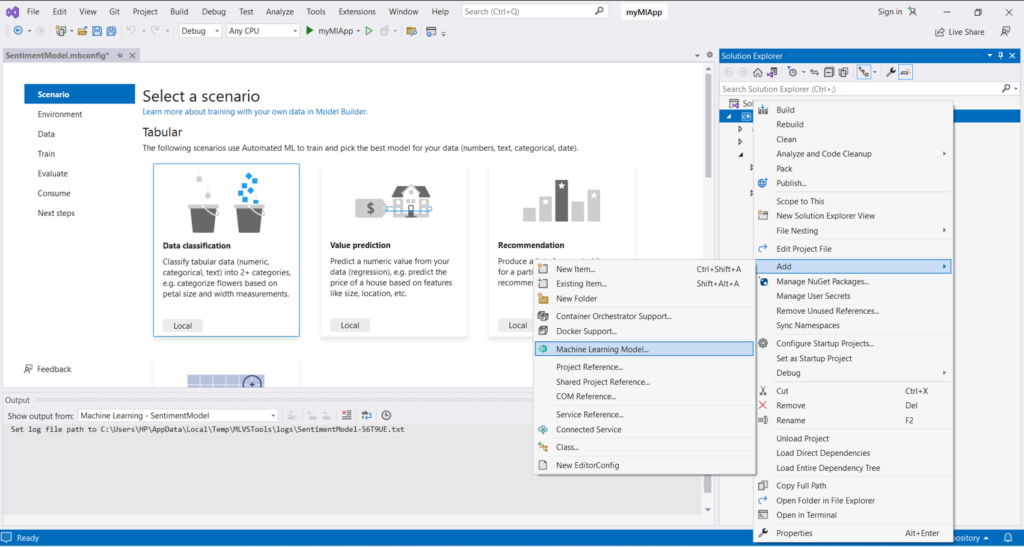
6.In the Add New Item dialog, make sure Machine Learning Model (ML.NET) is selected.
7.Change the Name field to SentimentModel.mbconfig and select the Add button

8.Pick a scenario
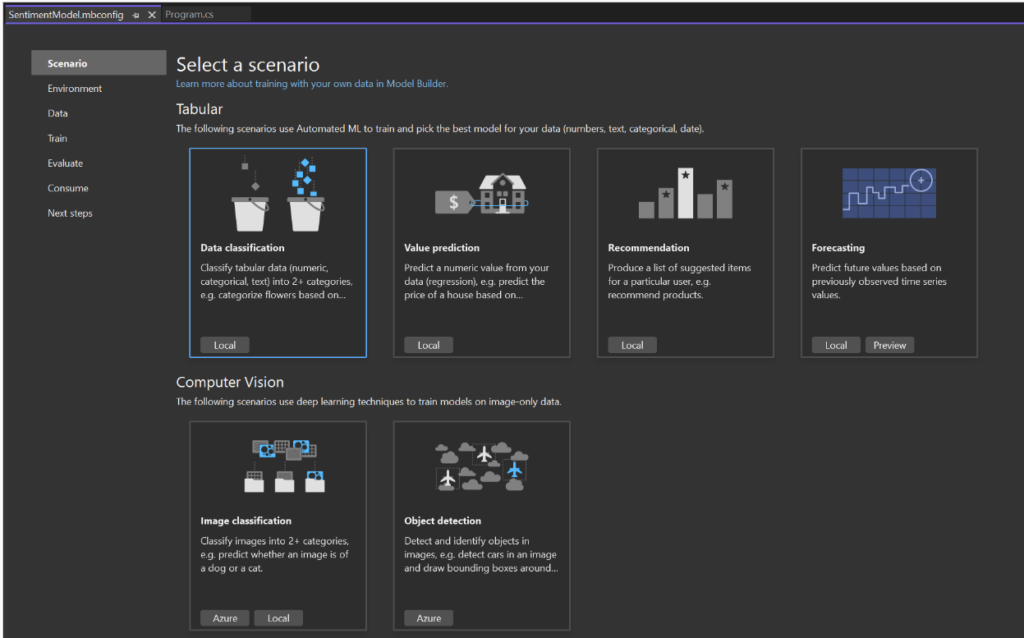
To begin, open the Model Builder tool and select the “Data classification” scenario from the available options. This scenario is suitable for predicting the category of a comment, such as determining whether it falls into a positive or negative sentiment.
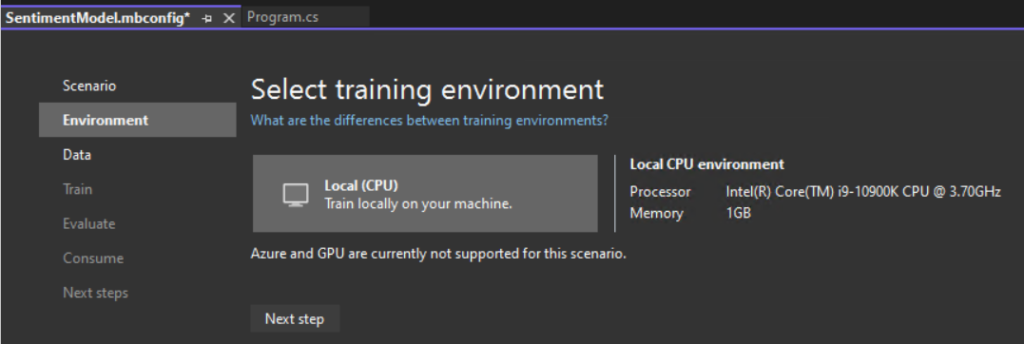
After selecting the “Data classification” scenario, ensure that the training environment is set to “Local.” Although some scenarios allow for training in Azure, classification specifically supports only local training. Once you have confirmed the local environment, proceed to the next step, which is the “Data” step.
Add data
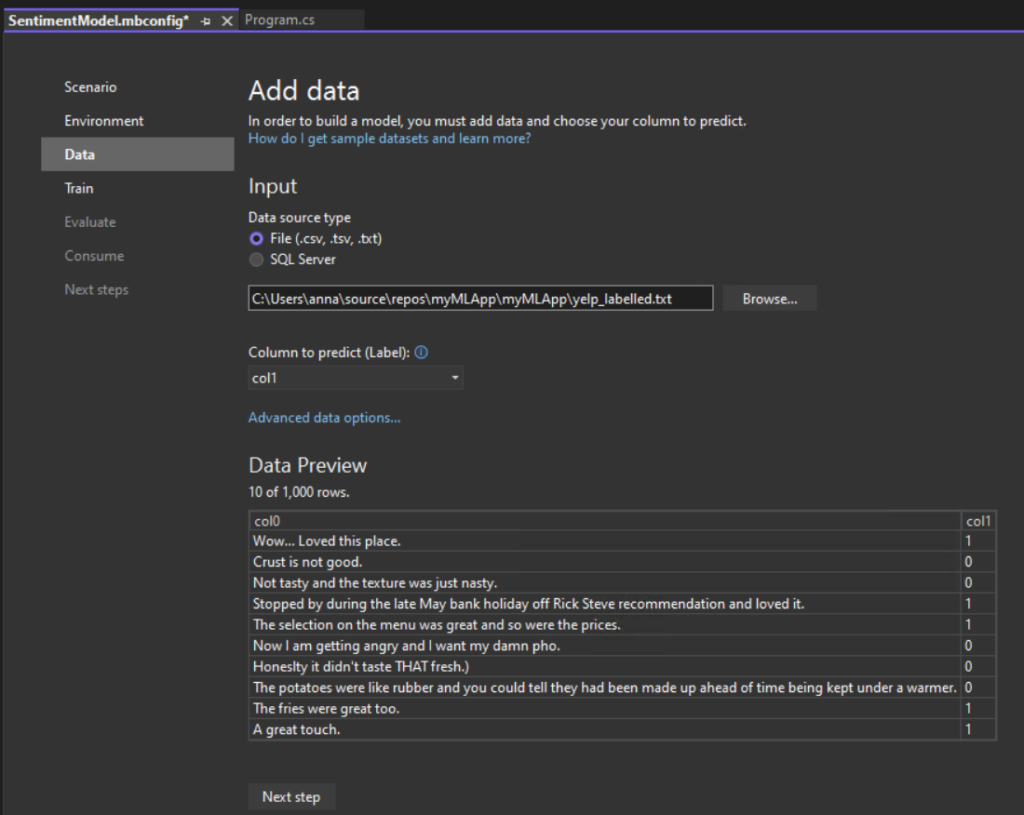
In Model Builder, you can add data from a local file or connect to a SQL Server database. In this case, you’ll add yelp_labelled.txt from a file.
- Select File as the input data source type.
- Browse for
yelp_labelled.txt. Once you select your dataset, a preview of your data appears in the Data Preview section. Since your dataset does not have a header, headers are auto-generated (“col0” and “col1”). - Under Column to predict (Label), select “col1”. The Label is what you’re predicting, which in this case is the sentiment found in the second column (“col1”) of the dataset.
- The columns that are used to help predict the Label are called Features. All of the columns in the dataset besides the Label are automatically selected as Features. In this case, the review comment column (“col0”) is the Feature column. You can update the Feature columns and modify other data loading options in Advanced data options, but it is not necessary for this example.
Train your model
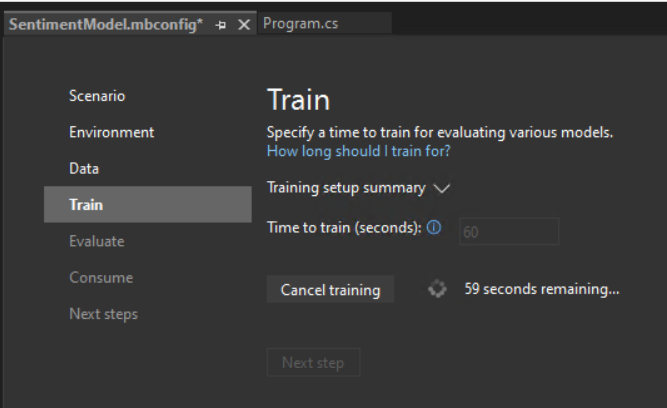
Now, you’ll train your model with the yelp_labelled.txt dataset.
Model Builder evaluates many models with varying algorithms and settings based on the amount of training time given to build the best performing model.
- Change the Time to train, which is the amount of time you’d like Model Builder to explore various models, to 60 seconds (you can try increasing this number if no models are found after training) . Note that for larger datasets, the training time will be longer. Model Builder automatically adjusts the training time based on the dataset size.
- Select Start training to start the training process. Once training starts, you can see the time remaining.
Training results
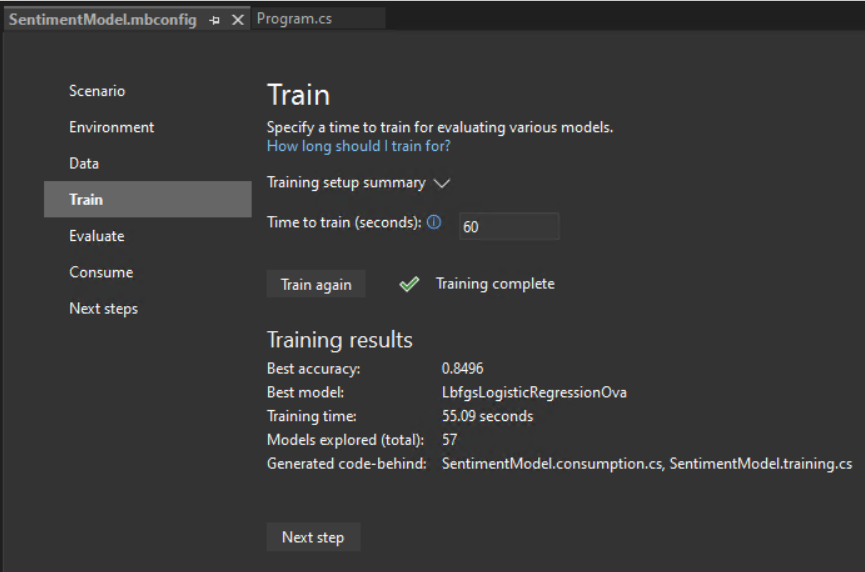
- Best accuracy – This shows you the accuracy of the best model that Model Builder found. Higher accuracy means the model predicted more correctly on test data.
- Best model – This shows you which algorithm performed the best during Model Builder’s exploration.
- Training time – This shows you the total amount of time that was spent training / exploring models.
- Models explored (total) – This shows you the total number of models explored by Model Builder in the given amount of time.
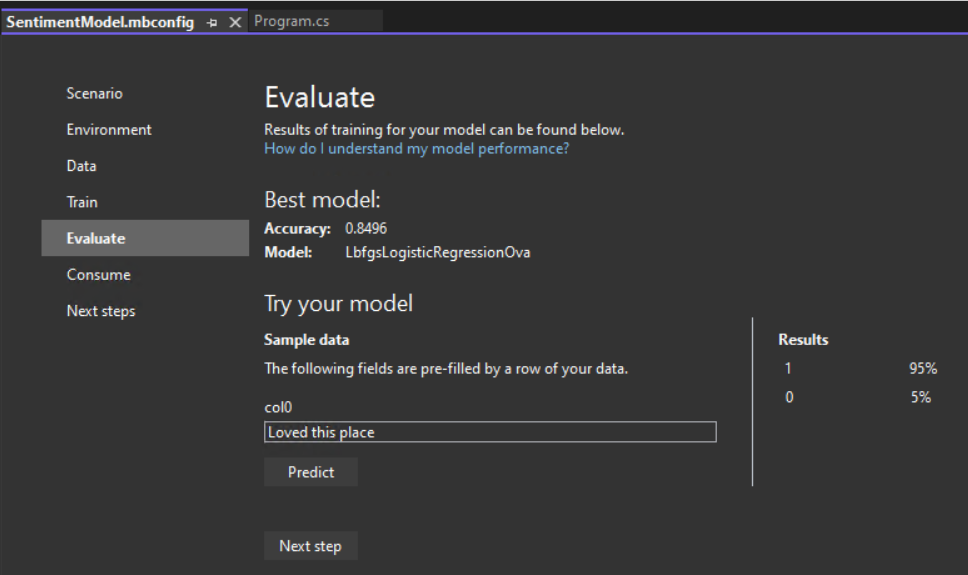
Evaluate your model
Consume your model
The last step is to consume your trained model in the end-user application.
- Replace the
Program.cscode in yourmyMLAppproject with the following code:
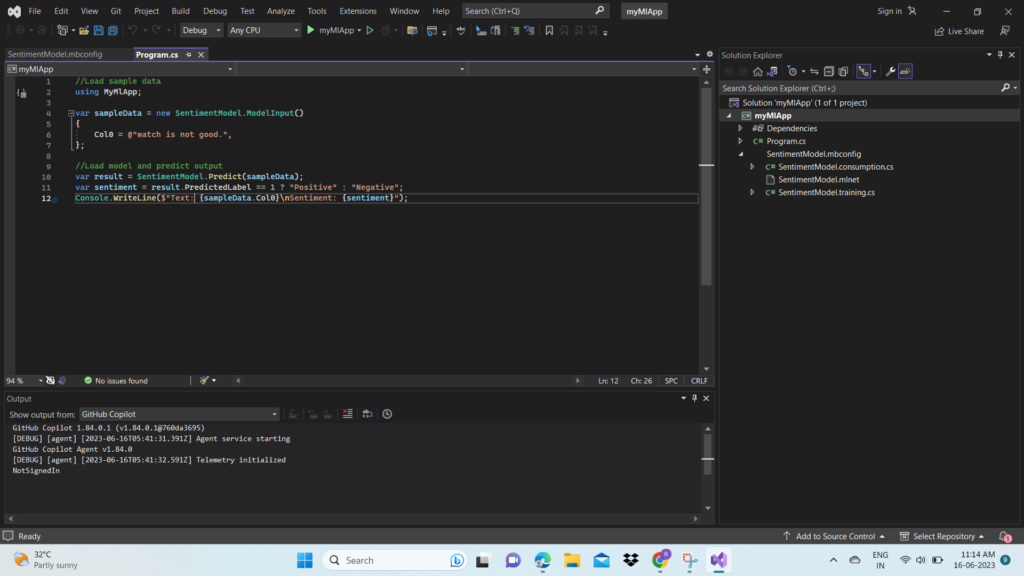
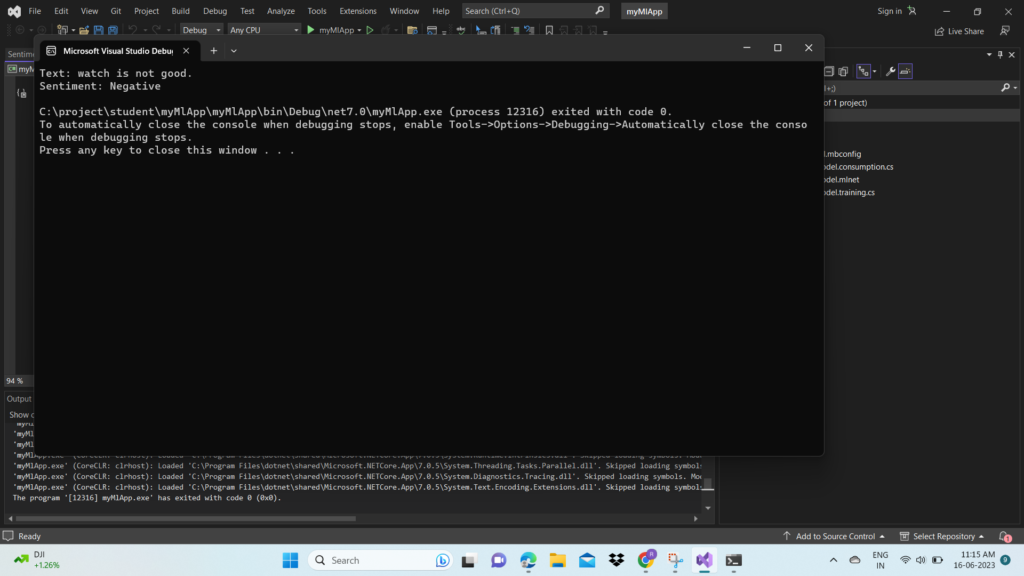
Run myMLApp (select Ctrl+F5 or Debug > Start Without Debugging). You should see the following output, predicting whether the input statement is positive or negative.